How to Clean Your Whirlpool Water Softner?
Cleaning your Whirlpool water softener is essential for maintaining its efficiency and prolonging its lifespan. You'll want to start by turning off the water supply and disconnecting the drain line to guarantee safety. Once you've done that, draining the water tank is next, followed by a thorough cleaning of the brine tank. But there's more to the process than just scrubbing and rinsing; understanding the right techniques and materials can make a significant difference in performance. So, what are the best practices you should follow for the best results?
Key Takeaways
- Turn off the water softener and disconnect the drain line to ensure safety before cleaning.
- Drain the brine tank by setting the bypass valve and opening the drain valve to remove old water.
- Clean the brine tank with a soft brush and a vinegar solution to eliminate residue and buildup.
- Refill the brine tank with high-quality salt, ensuring it is 10-12 inches above the water line.
- Restart the system by unplugging it for 10 seconds, then check settings and initiate a manual regeneration cycle.
Gather Necessary Supplies
Before you plunge into cleaning your Whirlpool water softener, it's essential to gather the necessary supplies. The right cleaning supplies and maintenance tools make the process smoother and more efficient.
Start by collecting a bucket, which will catch any water that spills during the cleaning. You'll also need a soft brush or cloth, as these will help you scrub away any buildup without scratching surfaces.
Next, grab some white vinegar or a specialized water softener cleaner. Vinegar is a natural option that effectively removes mineral deposits. If you opt for a commercial cleaner, verify it's compatible with your model.
Don't forget about gloves; they'll protect your hands from harsh chemicals and slippery surfaces. Lastly, keep a towel nearby for any unexpected messes.
Having these items on hand will streamline your cleaning process, making it less intimidating. Once you've gathered your supplies, you'll feel more prepared to tackle the task ahead.
Turn Off the Water Softener
Before you start cleaning your Whirlpool water softener, you need to turn it off properly.
First, locate the power switch to guarantee it's not drawing electricity, then shut off the water supply to prevent any leaks.
Finally, disconnect the drain line to safely prepare your unit for cleaning.
Locate Power Switch
To begin the cleaning process, you'll need to locate the power switch on your Whirlpool water softener and turn it off. This step is essential to guarantee your safety while you clean.
Power switch types can vary between models, so take a moment to familiarize yourself with your specific unit. Most often, the switch location will be found on the control panel, usually near the display screen or close to the top of the unit.
If you're having trouble finding it, check the user manual for diagrams or descriptions specific to your model. Once you've located the power switch, simply flip it to the "off" position. You might hear a click or see a light turn off, confirming that the water softener is no longer receiving power.
It's important not to skip this step, as it prevents any accidental malfunctions while you're working on the unit.
After turning off the power, you'll be ready to proceed with the next steps of the cleaning process, guaranteeing your water softener performs efficiently. Keeping it clean will help maintain its longevity and functionality, so it's worth taking the time to do it right.
Shut Off Water Supply
Shutting off the water supply is an important step in maintaining your Whirlpool water softener. Before you begin any cleaning or maintenance tasks, you need to verify that the water flow to the unit is completely stopped.
Locate the main water shut-off valve, which is usually found near the softener itself or in your home's plumbing system. Once you find it, turn the valve clockwise until it's fully closed.
Next, double-check to make certain that no water is flowing into the softener. You can do this by testing the faucets in your home; if they don't run, you've successfully shut off the water supply.
It's vital to perform this step to prevent any unwanted water from entering the system during cleaning, which can lead to mess or complications.
Disconnect Drain Line
Disconnecting the drain line is essential for safely turning off your Whirlpool water softener.
Start by locating the drain line, which typically runs from the softener to a nearby floor drain or sink. Before you proceed, verify that you've already shut off the water supply to the unit, as discussed previously. This step helps prevent any unwanted water flow during the disconnection process.
Once you've confirmed the water supply is off, carefully disconnect the drain line from the softener. You might need a pair of pliers or a wrench, depending on how tight the connection is. Be cautious, as any residual water in the line could spill out when you detach it. To minimize mess, have a small bucket or towel handy to catch any drips.
After disconnecting, check the drain line for clogs or buildup, as this can affect the unit's performance. If you notice any issues, clean it out before reattaching or moving on to the next cleaning steps.
Drain the Water Tank
Before you can effectively clean your Whirlpool water softener, you'll need to drain the water tank. This step is vital for maintaining water quality and guaranteeing your unit runs smoothly.
First, locate the bypass valve and set it to the bypass position to prevent water from flowing through the softener during the draining process.
Next, turn off the power supply to the unit to avoid any accidental activation. Now, you'll want to connect a garden hose to the drain line, directing it to a suitable drainage area.
Open the drain valve and let the water flow out completely. This might take some time, but it's important to drain all excess water to allow for a thorough cleaning.
While doing this, keep in mind some maintenance tips: regularly check for any debris or buildup inside the tank, and verify that the drain line is clear.
Once the tank is empty, you're ready to move on to the next steps in the cleaning process. By following these guidelines, you'll enhance the efficiency of your Whirlpool water softener and improve its longevity, guaranteeing better water quality for your home.
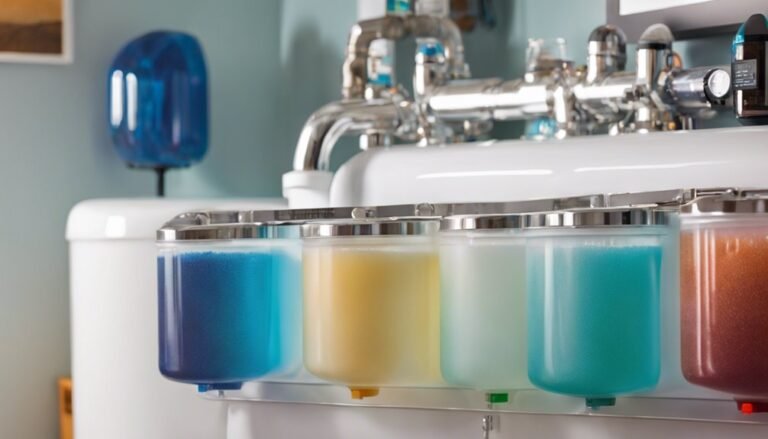
Clean the Brine Tank
Cleaning the brine tank is essential for keeping your Whirlpool water softener running smoothly.
First, you'll need to gather the necessary supplies to make the process easier.
Once you've emptied the tank, you can rinse it out and refill it with fresh salt, ensuring peak performance.
Gather Necessary Supplies
To effectively clean the brine tank of your Whirlpool water softener, you'll need to gather a few essential supplies. Having the right cleaning supplies on hand will make the process smoother and more efficient.
Here's a quick list of essential tools you should collect before you start:
- Bucket – You'll need a sturdy bucket to collect any water and salt as you clean.
- Soft Brush or Cloth – A soft brush or cloth will help you scrub away any residue without damaging the tank's interior.
- Vinegar or a Cleaning Solution – A mild vinegar solution or a specific cleaning agent can effectively break down any buildup and sanitize the tank.
Once you have these supplies, you're well on your way to ensuring your brine tank is clean and functioning properly.
Remember, using the right cleaning supplies not only helps in maintaining your water softener but also extends its life. Taking the time to gather these essential tools will pay off in the long run, so don't rush this step.
You're setting yourself up for success!
Empty the Tank
Now that you've gathered your supplies, it's time to empty the tank to prepare for a thorough cleaning of your Whirlpool water softener's brine tank. This step is essential for effective tank maintenance, as a clean brine tank directly impacts your water quality. Start by disconnecting the power supply and turning off the water to the system.
Next, remove any salt remaining in the tank. It's best to use a scoop or small container for this task. Once the salt is out, wipe down the sides and bottom of the tank with a damp cloth to remove any residue or buildup.
Here's a handy table to help you remember what to do:
| Task | Purpose |
|---|---|
| Disconnect power | Guarantee safety during cleaning |
| Remove salt | Prepare for thorough cleaning |
| Wipe down the tank | Maintain ideal water quality |
After you've completed these steps, your brine tank will be ready for the next part of the cleaning process. Regular tank maintenance not only extends the life of your water softener but also guarantees the best possible water quality for your home.
#
Rinse and Refill
After emptying the tank, it's important to rinse and refill the brine tank to guarantee peak performance. A clean brine tank guarantees that your Whirlpool water softener runs smoothly and efficiently. Here's how to effectively rinse and refill the brine:
- Rinse Cycle: Start by running a rinse cycle. This helps remove any remaining salt residue and debris from the tank. You can do this by filling the tank halfway with clean water and letting it sit for about 30 minutes before draining it again.
- Clean the Tank: Use a soft brush or cloth to scrub the interior walls of the tank. Pay special attention to any buildup or stains. A little soap can help, but make sure to rinse thoroughly afterward to avoid any residue.
- Refill Brine: Once the tank is clean, refill it with the appropriate salt. Make sure you're using high-quality water softener salt. Fill the tank until the salt level is about 10-12 inches above the water line, guaranteeing prime performance.
Following these steps will keep your brine tank in top shape, extending the life of your water softener.
## Rinse and Refill
When it comes to maintaining your Whirlpool water softener, rinsing and refilling are essential steps that shouldn't be overlooked.
The rinse process is vital for guaranteeing your system operates efficiently. Start by pressing the "Regenerate" button on your unit, which will initiate the rinse cycle. This process typically lasts about 10 to 15 minutes, during which the softener cleans itself, removing any trapped minerals and contaminants.
Once the rinse cycle is complete, it's time to follow the refill instructions to replenish the salt supply. Open the lid of your brine tank and check the salt level. If it's low, fill it with the appropriate type of salt until it reaches the recommended level—usually about three-quarters full. Avoid using rock salt, as it can lead to excessive sludge buildup.
After adding salt, give your softener a little time to dissolve the new salt and regenerate the brine solution.
This whole process guarantees that your water softener runs smoothly, providing you with fresh, soft water for your home.
Restart the System
Restarting your Whirlpool water softener is a crucial step to guarantee it's functioning at its finest. After you've completed cleaning, a system reset helps eliminate any glitches and makes sure everything is set correctly.
Here's how to restart your system effectively:
- Power Off: Unplug your water softener from the electrical outlet. Wait for about 10 seconds before plugging it back in. This simple act can resolve many minor issues.
- Check Settings: After powering back up, double-check the settings. Verify the time and salt level are accurately displayed. If anything seems off, adjust it according to the user manual.
- Initiate Regeneration Cycle: Start a manual regeneration cycle. This allows the system to clear out any debris and recalibrate itself. It's a crucial step in making sure peak performance.
If you encounter issues while restarting, don't hesitate to consult troubleshooting tips in the user manual. It can provide specific guidance if your water softener still doesn't function properly after the reset.
Schedule Regular Maintenance
Regular maintenance is key to keeping your Whirlpool water softener running smoothly and efficiently.
To guarantee peak performance, it's crucial to establish a maintenance frequency that suits your usage. Typically, you should aim for a thorough check-up every six months. This regular schedule helps catch issues before they escalate and guarantees your system functions at its best.
Create a service checklist to guide your maintenance tasks. Start by inspecting the brine tank for salt levels and any clogs, then check the resin beads for wear and tear.
Don't forget to clean the inlet and outlet screens, as they can accumulate debris over time. Furthermore, look at the control panel settings to make sure they're accurate and up to date.
Frequently Asked Questions
How Often Should I Clean My Water Softener?
You should clean your water softener every six months for ideal performance. Following these maintenance tips will guarantee efficiency and longevity. Regular cleaning frequency helps prevent buildup and guarantees your system runs smoothly and effectively.
Can I Use Vinegar to Clean the Brine Tank?
Yes, you can use vinegar to clean the brine tank. Vinegar's benefits include its natural ability to break down mineral buildup, ensuring your brine tank stays clean and functions properly without harsh chemicals harming your system.
What Are the Signs My Water Softener Needs Cleaning?
You might think your water softener's working fine, but poor water quality and salty taste indicate it needs cleaning. Regular maintenance tips include checking for clogs, resin buildup, or unusual noises during operation.
Is It Safe to Clean the Water Softener With Bleach?
It's not safe to use bleach for cleaning your water softener. Instead, consider bleach alternatives like vinegar or specialized cleaning solutions. These methods effectively sanitize without risking damage to your system or contaminating your water supply.
What Can I Do if My Water Softener Smells Bad?
If your water softener's giving off a bad odor, don't ignore it! Bad odor causes often stem from bacteria. Regular maintenance, like cleaning and checking your salt levels, can help keep things fresh.
Conclusion
Cleaning your Whirlpool water softener isn't just a chore; it's essential for ensuring consistent performance and extending its lifespan. By following these steps, you're not only enhancing water quality but also preventing costly repairs down the line. Remember, a well-maintained softener can save you money and improve your home's water experience. So, make cleaning a regular part of your maintenance routine, and you'll enjoy the benefits of soft water for years to come.