Installing a Whes Water Softner
When you're considering installing a WHES water softener, it is crucial to understand the process and its benefits. You'll need to prepare your space carefully, ensuring you have all the necessary tools and materials at hand. Once you've turned off the main water supply and selected the right location for the softener, you'll find that the installation can be straightforward. However, there are nuances to each step that can impact the system's efficiency. What you do next can make all the difference in the long run. Are you ready to explore the critical installation steps?
Key Takeaways
- Gather essential tools like a pipe wrench and screwdriver set, and ensure you have the necessary materials such as the softener tank and fittings.
- Turn off the main water supply before starting the installation to prevent any leaks or flooding.
- Install the bypass valve to allow water flow during maintenance and connect the drain line according to the manufacturer's instructions.
- Conduct routine checks on salt levels and clean the resin bed annually to maintain the softener's efficiency.
- Test the water quality after installation to ensure proper hardness levels and monitor for any unusual changes.
Understanding Water Hardness
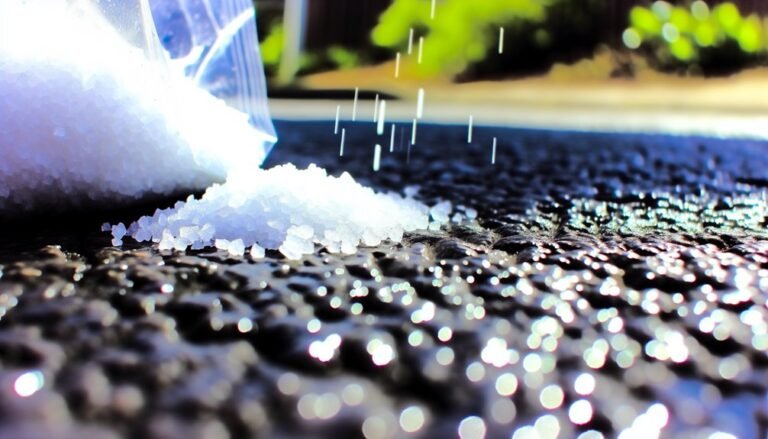
Water hardness is often misunderstood, but it frequently affects your home's plumbing and appliances. You mightn't realize it, but the minerals in your water, particularly calcium and magnesium, contribute to what we call water hardness. This isn't just a minor detail; hard water can lead to scale buildup in pipes and appliances, reducing their efficiency and lifespan.
To understand your water quality better, water testing is essential. By testing your water, you can determine the hardness level and identify any potential issues before they escalate. Many local health departments or water utilities offer free or low-cost testing kits, so you can easily find out how hard your water is.
Once you know your water hardness level, you can make informed decisions about your plumbing and appliances. If you discover that your water is hard, it's worth considering additional treatment options, like water softeners.
These systems can effectively reduce mineral content, helping protect your home's plumbing while improving your water quality. By understanding water hardness and testing your water, you empower yourself to take action and maintain a healthier home environment.
Benefits of Water Softeners
Water softeners offer a range of benefits that can greatly improve your daily life.
You'll notice your appliances lasting longer, your skin and hair feeling softer, and a decrease in the amount of soap you use.
Improved Appliance Lifespan
Installing a water softener can greatly extend the lifespan of your household appliances. Hard water can wreak havoc on your appliances, leading to decreased efficiency and costly repairs. By softening the water, you'll enjoy several longevity benefits that enhance appliance performance.
Here are four key ways a water softener helps your appliances last longer:
- Reduced Scale Buildup: Soft water prevents mineral deposits from forming in pipes and appliances, ensuring they operate smoothly.
- Improved Efficiency: Appliances like dishwashers and washing machines work better with softened water, using less energy and water for peak performance.
- Less Frequent Repairs: By minimizing wear and tear, you'll spend less time and money on repairs, keeping your appliances in top shape longer.
- Extended Lifespan: When appliances don't have to work as hard, they can last years longer, saving you money on replacements.
Investing in a water softener isn't just about convenience; it's a smart choice for protecting your appliances and maximizing their lifespan.
Enjoy the peace of mind that comes from knowing your major investments are well cared for.
Enhanced Skin and Hair
Hard water can also impact your skin and hair, making a water softener a beneficial addition to your home. The minerals in hard water can lead to dryness, irritation, and even dullness in your hair. When you switch to softened water, you'll notice significant improvements in both skin hydration and hair manageability.
Here's a quick look at how a water softener can enhance your skin and hair:
| Benefit | Skin Effects | Hair Effects |
|---|---|---|
| Hydration | Improved moisture retention | Increased shine |
| Irritation Reduction | Fewer breakouts | Less frizz |
| Softness | Smoother texture | Easier styling |
Reduced Soap Usage
When you switch to a water softener, you'll notice a significant reduction in soap usage around your home.
This change not only saves you money but also improves your cleaning efficiency. Hard water contains minerals that make soaps and detergents less effective, meaning you often need to use more than necessary.
With softened water, you'll achieve the same clean with less product.
Here are four benefits of reduced soap usage:
- Soap Savings: You'll use up to 50% less soap in your daily routines.
- Longer Lasting Products: Your soaps, shampoos, and detergents will last much longer, giving you more bang for your buck.
- Better Lather: Softened water creates a richer lather, making your cleaning tasks more effective.
- Less Residue: You'll notice fewer soap scum deposits on your fixtures and surfaces, leading to easier cleaning.
Tools and Materials Needed
Before you start installing your water softener, you'll need to gather some essential tools and materials.
Having the right equipment on hand will make the process smoother and guarantee everything goes according to plan.
Don't forget to include safety gear to protect yourself while you work!
Essential Tools Required
Installing a water softener requires careful preparation and the right tools to guarantee a smooth process.
You'll want to make certain you have the proper equipment on hand before diving into the installation techniques.
Here's a quick list of essential tools you'll need for effective tool selection:
- Pipe Wrench – This will help you tighten or loosen plumbing connections without damaging them.
- Screwdriver Set – A variety of screwdrivers allows you to handle different types of screws you might encounter.
- Hacksaw – You'll use this to cut pipes or other materials to the required lengths.
- Measuring Tape – Accurate measurements are vital for a proper fit, so don't skip this one!
With these tools, you'll be well-equipped to tackle the installation process.
Proper tool selection not only makes your job easier but also guarantees that you can follow the necessary techniques efficiently.
Materials for Installation
Gathering the right materials is vital for a successful water softener installation. Start by gathering the necessary water softener components, including the softener tank, brine tank, and resin.
Make certain you have the appropriate fittings and connectors, like PVC or PEX piping, to connect the system to your existing plumbing.
You'll also need a few additional items to enhance your installation techniques. A hose clamp, Teflon tape, and a shut-off valve are essential for securing connections and guaranteeing water flow control.
Don't forget a wrench for tightening fittings and a bucket to catch any spills.
If your water softener requires a drain line, make certain you have the right tubing and fittings for that as well. A measuring tape can help you determine the space you need for installation and confirm that everything fits properly.
Lastly, consider having a clear plan or diagram of your plumbing layout. This will help you visualize how all the components work together, making the installation process smoother.
With the right materials in hand, you'll be ready to tackle your water softener project with confidence!
Safety Equipment Needed
When setting up your water softener, having the right safety equipment is vital to protect yourself during the installation process.
By following proper installation precautions and using appropriate safety gear, you can guarantee the task goes smoothly and safely.
Here's what you'll need:
- Safety Glasses: Protect your eyes from debris and splashes while working with tools and plumbing components.
- Gloves: Wear durable gloves to shield your hands from sharp objects, chemicals, or rough surfaces.
- Dust Mask: If you're working in a dusty area or handling materials that could release particles, a dust mask is important for respiratory protection.
- Knee Pads: Installing a water softener often requires kneeling. Knee pads can prevent discomfort and injury from prolonged kneeling on hard surfaces.
Preparing for Installation
Before diving into the installation of your water softener, you'll want to make certain everything's in order. Start by creating a pre-installation checklist. This will help you gather all the necessary tools and materials. Check if you have the right fittings, hoses, and the water softener unit itself. Having everything on hand will streamline the process.
Next, assess your installation timeline. Decide on a date that allows you ample time to complete the project without rushing. This is especially important if you're planning to do the installation on a weekend or around other commitments. Making a plan helps you stay focused and organized.
Don't forget to prepare the installation area. Clear away any clutter and confirm there's enough space for you to work comfortably. Check the water supply line and drainage location, as these will be vital during installation.
Lastly, familiarize yourself with the manufacturer's instructions. Understanding the specifics about your unit will save you time and confusion later on. By following this preparation step, you'll set yourself up for a smoother installation experience.
Step-by-Step Installation Process
Now that you're prepared, it's time to plunge into the step-by-step installation process for your water softener. This can seem intimidating, but with a clear plan, you'll navigate any installation challenges with ease.
Here's a simple guide to get you started:
- Turn Off Water Supply: Before you begin, verify that you've shut off the main water supply to avoid any flooding or leaks.
- Prepare the Installation Site: Clear the area around where you'll install the softener. Make sure there's enough space for the unit and easy access for maintenance.
- Install Bypass Valve: Attach the bypass valve to the softener. This will allow you to divert water flow during maintenance or repairs.
- Connect Drain Line: Confirm you have a proper drain line installed. This is essential for the brine cycle and will help prevent any overflow or backflow issues.
As you move through these steps, keep in mind some troubleshooting tips. If you encounter any leaks or issues, double-check your connections and seals.
Connecting the System
Connecting the system is a significant step in guaranteeing your water softener operates effectively.
Begin by locating the inlet and outlet pipes on your softener. You'll need to start connecting pipes that lead from your water supply to the softener's inlet. Use the appropriate size fittings, as guaranteeing a snug fit is essential for preventing leaks.
Next, connect the outlet pipe that delivers softened water back into your home. Don't forget to run a bypass valve if you want the option to use unsoftened water.
While you're at it, make sure you're securing valves properly; this helps maintain pressure and prevents any accidental disconnections.
Once you've connected the pipes, double-check all your connections. Tighten any loose fittings, and inspect for any signs of leaks. This streamlined process won't only enhance the functionality of your system but also prolong its lifespan.
Finally, confirm your water softener is plugged into a power source, following the manufacturer's instructions.
Testing Water Quality
After you've successfully connected your water softener, it's time to evaluate its performance by testing your water quality.
A detailed water quality assessment will help you understand how effectively your system is working and whether it meets your needs.
Here are four key steps to guide you through the water testing process:
- Collect Samples: Gather water samples from different locations in your home, like the kitchen tap and bathroom sink. This guarantees a thorough analysis.
- Test for Hardness: Use a water hardness test kit to measure the calcium and magnesium levels. This will show how well your softener is reducing hardness.
- Check pH Levels: Testing the pH will indicate if your water is too acidic or alkaline, which can affect plumbing and appliances.
- Assess for Contaminants: Use a water testing kit to check for common contaminants, like chlorine, lead, and bacteria, ensuring your water is safe to drink.
Maintenance Tips for Longevity
To guarantee your water softener lasts for years without issues, regular maintenance is essential. Start with routine checks every few months. Inspect the salt levels in the brine tank; if they're low, refill with the appropriate type of salt. Keeping the salt level consistent helps to secure maximum performance.
Next, clean the resin bed annually to prevent buildup that can hinder efficiency. You can do this by following the manufacturer's recommendations for cleaning solutions.
If you notice any unusual sounds or changes in water quality, these could be signs that something's wrong. Use troubleshooting tips from your user manual or consult a professional if needed.
Also, inspect the unit's connections for leaks or corrosion. Tighten any loose fittings and replace worn-out parts promptly.
Finally, consider scheduling a professional service every few years for an in-depth assessment.
Frequently Asked Questions
Can I Install a Water Softener Myself, or Should I Hire a Professional?
You can tackle a water softener installation yourself with DIY installation, but if you're unsure about plumbing, hiring professional assistance guarantees everything's done correctly and efficiently, saving you time and potential headaches down the line.
How Do I Know What Size Water Softener I Need?
Did you know nearly 85% of American homes have hard water? To determine the right size water softener, consult a sizing guide that factors in your water hardness and household usage for peak performance.
Will a Water Softener Affect My Drinking Water Quality?
A water softener can improve your drinking water's taste quality by reducing mineral content, like calcium and magnesium. However, it may also add sodium, so it is important to check the system's specifications for your needs.
How Often Do I Need to Refill the Salt in the Softener?
You'll need to check the salt levels regularly, usually every month. The refill frequency depends on your water usage and hardness; just make certain you maintain adequate salt to keep your water softener running efficiently.
Can I Use Any Type of Salt for My Water Softener?
You can't use just any salt types for your water softener; certain types work better. Consider salt alternatives like potassium chloride, which can soften water effectively while being gentler on your plumbing and environment.
Conclusion
To sum up, installing your WHES water softener is like planting a tree; with the right care and attention, it'll thrive and enrich your home. By following each step diligently, you're not just softening your water—you're creating a healthier environment for your family and enhancing the longevity of your plumbing. Remember, regular maintenance is the sunlight that keeps your system flourishing. Now that you're equipped with knowledge, enjoy the benefits of soft water for years to come!